Showing posts with label kitchen. Show all posts

Monday, January 31, 2011

Delicate Kickboards


On Sunday, Pete worked on and finished the kickboards in the kitchen. We opted for a stainless steel finish. Like our other kitchen components, they were from IKEA.

We purchased two packs. From that, Pete managed to fit an extra offcut on the side gap where the fridge is (not shown in pictures).

They are pretty basic bits of MDF covered in aluminium look contact. Not even a thin sheet of real metal!) They attach to the legs with the clips that were supplied in the pack. Pete finished it with a clear waterproof filler on the edges.

Here's the before and after. Everything in the photo below is now DONE! Like a snippet into the near future..

Thursday, January 13, 2011

90% - 5 minutes. 10% - 5 days

I've worked out some sort of ratio to renovation projects. Some days you reach this point where you're working on a project and in a matter of hours, the whole unit can seem transformed. A day where you really feel like you've accomplished something. The before and after of this, at times overwhelming, transformation is a lot of preparation, moving things, cleaning up and finishing off. While a project is underway, there are days spent working, days with friends and family and days researching.

Finally, today, after 2 weeks of mess in the kitchen, we have finished the wall. Days of touch ups and I am finally satisfied enough to put back the racks and dishes.

Tuesday, January 4, 2011

Rock Oyster

I have finally gotten round to painting the wall in the kitchen. Continuing on with Wattyl paint, I have used 1 litre of Wattyl ID with a colour called Rock Oyster in a low sheen. The wall is 2 meters wide and 2.6 high so 2 coats was fine for the 1 litre can though I wouldn't want to paint much more than that as there was only really just enough left in the tin to finish the job. We are waiting for the paint to dry so have not yet put back our racks but I will update this post soon so you can check the final look.

For a while I was tossing up between two other greys (Snowdonia and Colourbond Windspray) but settled for this shade of "Greeny, natural grey" called Rock Oyster as it was more fitting with the natural shades of the floor (yet to be installed) and the wood finish benchtops in the kitchen.


Thursday, December 9, 2010

Get a Handle on it

We have thought about handles for a little while and even though they seem like a small and silly thing to dwell on, they can actually make or break a kitchen. Trust me, I have seen many a disaster kitchen from Google image search to justify the fuss. So many kitchens could have looked good if they didn't make such awful choices on handles. We're teaming up the handles with our current accessories. The fridge is a little retro, the oven and tap have curved, rounded knobs but we still want to keep things pretty minimal. We are being drastic and selecting two different handles. Apparently this is not the normal thing to do, but I am convinced this will look good.

So the cabinets above will have a sneaky little pulley type knob that sits on the edge of the door and is attached from the inside of the door. The drawers need something a little stronger, more sturdy. They will have a curved corner slightly stocky (not so elongated or square). They give the cabinets a bit of a retro feel which I think will give the kitchen a bit more personality. You'll see what I mean when I show you the pictures of the handles attached.

PS: We are buying our handles from United Kitchen Co. They have been very friendly. They make and install kitchens and sell a big range of entry doors, bedroom doors etc. There's a guy there called Phil, good customer service. He has the same thumbs as me which is really rare. There are specialty shops that only sell handles and door knobs. One in Leichhardt too, though they're rude - and pricey too I believe. (These things seem to go hand in hand I've noticed).
See so it goes to show the importance of handles, you can find such a huge range and shops dedicated to them!


Whats Cooking Good Looking?


The kitchen we had for the last couple of months was getting to be unbearable. Check out the before shots. YUCK with a capital Ugh!


With a fresh start. Demolition took a couple of days. The tiles were really hard to get off the wall. and the cork like underlay which protected the original vinyl tiles was a nightmare. We used the power drill mainly with a jackhammer type chisel end to remove it. It was incredibly noisy and we went from the blocks least liked to most hated neighbours. The plumber disconnected the hotwater system and modified the existing tap sockets. Bill the electrician removed the oven. (Which we've recently sold on ebay for a bit of extra pocket money.)


Peg worked through the weekend and I joined in on Monday/Tuesday just passed. We had 3 days to complete the kitchen and on the 4th day, installation of the hotwater system, sink and taps as well as the lights, oven, cooktop and rangehood installation. We were overtime. Rescheduled the electrician. Fit in the plumber in the afternoon instead of the morning. The modified cabinet in the corner was a killer and the benchtop was almost chucked in the bin ready to start again. The masons mitre join (which connects the two pieces of benchtop in the corner) seemed straightforward but was a real bugger to get right. Only one second chance for a recut (which was really a trim) to realign or the whole slab would be history. It worked out in the end but it was one of the hardest tasks of the kitchen building process.


So this is where we're up to. ALMOST finished the most of the cabinetry. Waiting on a few cabinet drawer fronts from IKEA and eventually a splashback and floor will slot in. Handles are in the works and will be attached soon.


Tuesday, November 30, 2010

A Kitchen Update: Update.

We have installed the high wall cabinets.


Pete has also demolished the original pantry/cabinet that was located on the opposite wall. Most of our kitchen belongings are sitting in half made ikea base drawers and we were able to fit the crockery and other large items in the cabinets. It was really tricky to patch the concrete wall behind the cabinet as it was the original unpainted concrete with a thick line of paint on the edge. I'm thinking this wall will be painted a dark grey colour, we will wait until the rest of the kitchen is in before we finish that wall though.


Spot the difference:

Monday, November 15, 2010

Degaustration - Hors d'oeuvre

Somethings a little different to the way it was before. But just a bit. We put up our first cabinets. Doing them in installments so its not too overwhelming. All the wall cabinets are actually "Fan Cabinets" from IKEA but they are exactly the same as regular cupboards. They fit really well as a group of three. They are also a nice square shape and are really functional because the doors aren't too big. (56cm x 60cm).

Remember before:

And after:

We are going to place cabinets above for things that we use less often. Stylish AND functional. It's what IKEA is all about isn't it...These will be fan cabinets (35cm x 60cm). The doors arrive in a protective blue coating. The finish is Faktum Abstrakt in white. For a while I was thinking of making a couple of cabinets a feature by buying grey doors, but decided against it because you really cant beat just white for such a small space. Pete also concreted the routing job from when Bill the electrician relocated the fuse box.


The trouble with IKEA is working around their limited sizes. We wanted to build the rangehood INTO the cabinet so that it was hidden. This was something that we had in our rental at Cooper street and we really liked the look. Naturally IKEA does not accommodate for altering. They supply flatpack cabinets. Simple shapes, limited sizes.
Now how clever is this: The stainless steel pull out front of the rangehood was removed and replaced with a drawer front. (These can be purchased as a single item for a few bucks from IKEA.) It is in the same Abstrakt White finish as the doors. The rangehood is recirculating (ie: not ducted) by Omega.
Pete cut down the back and a shelf to fit in the fuse box. All shelves are purchased seperatley because the fan cabinets do not come with shelves.

Below: I realise now after taking this picture that I forgot to peel off a strip of the protective coating from the bottom of one of the doors!


And what did I do? I helped to lift one cabinet and went to work all weekend. I come home and discover this monolithic existence that has landed in our kitchen. Its pretty awesome to see our space change so quickly now.


Monday, November 8, 2010

Ikea? Ok Yah.

Very soon we will be working on the kitchen which will be very exciting because just look at the current state of our kitchen (chopped together because its so small, I cant fit it in one shot!!). I love cooking (almost as much as I love cookbooks)...anyway, its hard having anyone over for lunch or dinner because there's nowhere to sit and its been really tough cooking under these conditions.We only have about a quarter of our kitchen stuff unpacked from boxes. The hardest thing is baking cakes. Almost impossible but where theres sugar, theres a way.


After much consideration, months and months worth, then some reconsideration, this is the best layout we have come up with. Maybe not THE best priced, or THE most stylish or THE most functional but it is the most of all these things with only compromising on some things. If that makes sense. For example, the fridge will remain free standing, but because flat-pack DIY kitchens offer limited sized cabinets, nothing quite worked without adding a huge cost and dodgy patch ups. We could have gone for just three large overhead cabinets instead of six, but aesthetically six look good. We went for two sets of drawers even though drawers are probably the most expensive component to a kitchen, but these will be really functional (hate reaching to the back of cupboards for things that we will need to use often.)

The sink and hotwater system will stay in place to save on costs from the plumber. Wish we could have fit in a front loader washing machine, but not enough space. We wont be putting in a dishwasher and we don't use a microwave so saved on space there too.


We are going with IKEA because its well priced, offers a good selection of different shaped cabinets and they are actually pretty good quality. Plus they are stylish and have nice finishes.
We are going for a White Abstrakt finish, aluminuim kick-board (you don't see as many scuff marks) and laminate bench top (about a third of the cost of stone and half of wood). Minimal handles.

Wednesday, September 8, 2010

The Bright Lights of Modernity

Currently, the lights in the apartment, (all but the bathroom light) seem to be original. They are brass and frosted glass, stuck to the ceilings like the first wave of oyster lights. They are not retro chic, vintage cool or period charm, so they must go.

We started the light journey into looking at LED down lights. After all, we were fitting a new ceiling, so we could take advantage of making life easy and installing them at the same time, before the plasterboard got in the way. After researching into it, mainly on blogs, the process it seemed would have been expensive, fiddly, risky and less effective than you may think. LED's are a fairly new type of globe, especially to the residential market. Each globe uses a very small amount of wattage to produce a massive amount of light. LED's can start and range up to 3,4,5 watts, the equivalent of a regular halogen down-light uses around 40-50 watts each. PLUS an LED globe lifespan can last for many years. (I've read up to 50,000 hours. That's about 6 years if you left it on 24 hours a day!!!)
Now here's the "BUT" and indeed it is an important one because we wont be installing LED down lights because of the buts. Each LED down light can cost around $80-$100, omitting 9 watts of power with a 3x3 watt globe. The light is very directional and lights up with a narrow beam rather than as a sheet of light. The light can also look quite blue, the newer "warm light" ones looked VERY yellow and artificial. Installing energy saving globes (that's the common spiral ones that were all used to now) into regular down light fittings were another option, however many people found that they took a long time to warm up as the globes are so small. A forum speaker said it took 30-60 seconds to light up, depending on how cold of a day it was.
As for regular down lights, by law you need to have a gap in your roof of 100mm (so we would have had to lower the ceiling by more than we wanted) because of potential fire hazards. There was no way I was installing hot little burning embers in the ceiling. (Plus they output waaay to much energy which was the reason behind the LED saga in the first place.


Here is our solution:
For the bedroom, we purchased this lovely bit of bling. They were selling this in the shop for around $500. I bought the very same from a guy in Waterloo who was selling it on Ebay for $200 (I got him down to $150 though!). He bought it back from Hong Kong but couldn't install it because it was too heavy. Its VERY heavy actually, though made out of acrylic. Our ceilings being concrete will be able to withstand the weight.


Something similar to this was purchased from Luminous Lifestyle. These spot lights are a new addition and will sit next to the shelves, lighting up the dullest corner of our apartment.


Similar to this Louis Poulsen "Satelitte" light, a timeless design from the 50's, we purchased two lights to sit as spotlights over the prep area once we install our new kitchen.


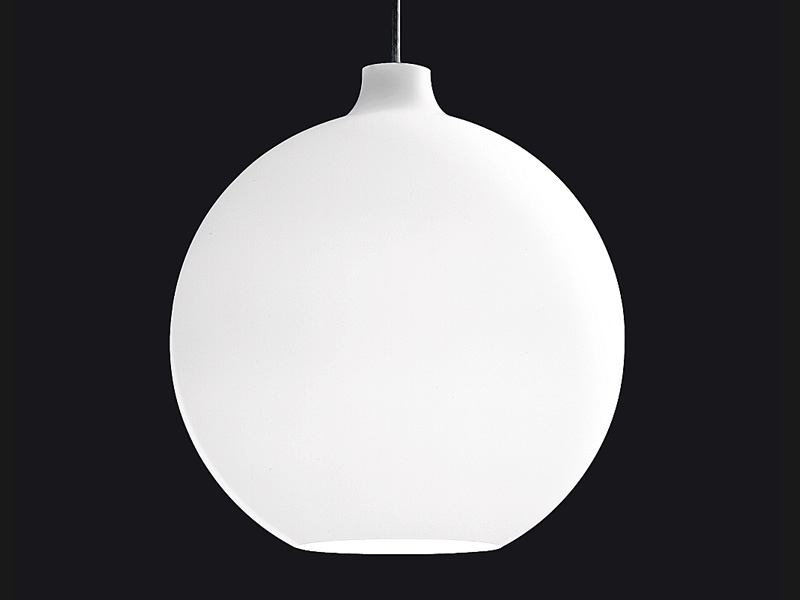
I found this image online as inspiration for two drum lights to go in both the lounge and dining area. Most pendant lights I have found only have one globe with a maximum wattage of 100, (That's 20 watts with energy saving globes.) and I'm not sure if its going to be bright enough. Need to test this out and then go shopping so were ready for the electrician. Hes coming this Tuesday to start work.

Sunday, August 22, 2010

Bargins

Thought Id mention a few things that we have sitting around the apartment at the moment that are waiting for a home. Currently sitting in boxes, there are many items in particular for the kitchen that I have bought as bargain buys.
Firstly, this is an OVALE kitchen sink mixer. I love the square shaped spout but with rounded edges. I also purchased the bathroom sink mixer and shower mixer at the same time on Grays. All purchases have been an absolute bargain. The induction cook-top and white oven by SMEG are also still in their package, purchased from Grays and I cant wait to bake! I love the three burner cooktop (who has all 4 burners running at once anyway?!) and the semi-retro nobs on the oven. Works really well with our semi retro Fisher & Paykel fridge that we will be keeping.


A great buy on the weekend was our rangehood and sink from The Good Guys. This Blanco sink was sitting on its lonesome out of its box crying out for a home. Its quite unique because it has an overflow drainer which is a bit weird but probably why it had not been picked up by someone else. Perfect for us though because the drainer has nice lines, the edges are not too round, not to square and the bowl isn't too deep so extra storage in the cupboard underneath, plus it already has the tap hole cut out ready for installation.