Showing posts with label Lighting. Show all posts

Monday, March 7, 2011

Leichhardt in Lights

Oh Hai. We have moved to www.pigeonhq.com
Pretty much the same but no .blogspot. Same but BET-TER.

Found this bargain on eBay. I won this lamp for just $31. I was considering a retro wooden floor lamp that I could spray paint a new colour and revamping the shade with some quirky material, however when I saw this lamp for sale from an eBayer just one suburb away, I thought it was worth changing my mind. The only work it needed was a clean. The base was fine, but the shade was really dusty. You can imaging how much dust collects in those folds. I removed the shade and washed it in the shower with some dishwashing liquid. The shade is made of thick plastic so it dried in no time.


A few other goodies, this decanter was from an op-shop down in the Illawarra, just $3. Made in France. I dont think it ever had any booze in it. It had a "Sherry" bling necklace around the lid which I gave back to the op-shop. You never know, maybe some lucky gal called Sherry will visit them soon. It's empty at the moment, but anytime dad wants to "donate" a new liqueur , this is where it will go. Today I found a nice white frame with glass for $4. It needed a clean with some some windex. It didn't quite fit my King Mini print (too big) but this will do for now. I want to pick up a matt-board with a pattern, cut to size so I can finally frame this for good.


Ceramic vase: $2
Original retro pair of juice glasses: $3 each.

Both in mint condition, the vase still has its sticker attached (soon to be removed). Now to raid the neighborhood gardens for some small floral pickings...with permission of course.

Thursday, December 9, 2010

Whats Cooking Good Looking?


The kitchen we had for the last couple of months was getting to be unbearable. Check out the before shots. YUCK with a capital Ugh!


With a fresh start. Demolition took a couple of days. The tiles were really hard to get off the wall. and the cork like underlay which protected the original vinyl tiles was a nightmare. We used the power drill mainly with a jackhammer type chisel end to remove it. It was incredibly noisy and we went from the blocks least liked to most hated neighbours. The plumber disconnected the hotwater system and modified the existing tap sockets. Bill the electrician removed the oven. (Which we've recently sold on ebay for a bit of extra pocket money.)


Peg worked through the weekend and I joined in on Monday/Tuesday just passed. We had 3 days to complete the kitchen and on the 4th day, installation of the hotwater system, sink and taps as well as the lights, oven, cooktop and rangehood installation. We were overtime. Rescheduled the electrician. Fit in the plumber in the afternoon instead of the morning. The modified cabinet in the corner was a killer and the benchtop was almost chucked in the bin ready to start again. The masons mitre join (which connects the two pieces of benchtop in the corner) seemed straightforward but was a real bugger to get right. Only one second chance for a recut (which was really a trim) to realign or the whole slab would be history. It worked out in the end but it was one of the hardest tasks of the kitchen building process.


So this is where we're up to. ALMOST finished the most of the cabinetry. Waiting on a few cabinet drawer fronts from IKEA and eventually a splashback and floor will slot in. Handles are in the works and will be attached soon.


Friday, November 5, 2010

I see the light. Hallelujah!


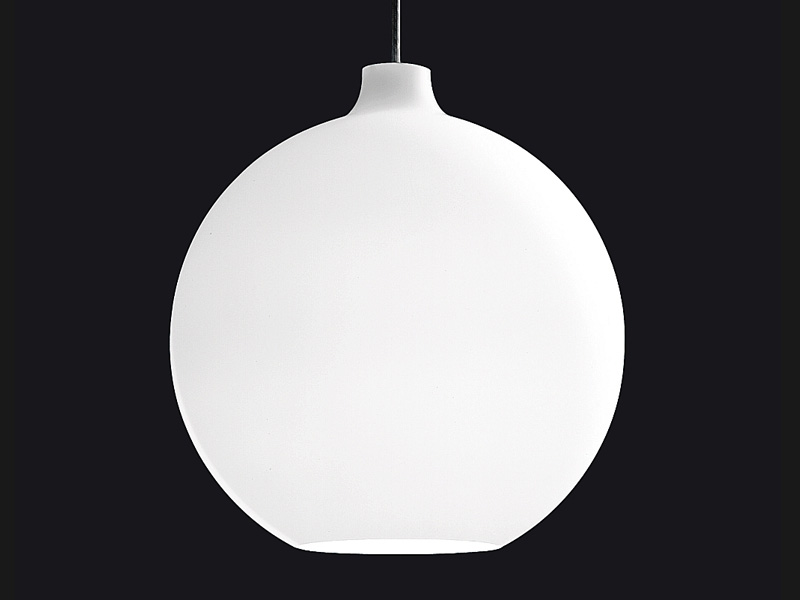
After purchasing two white drum pendant lights on eBay, (similar to the ones in the image above) I tested them by holding them up over the naked lit globes to discover that they blocked way too much light. They would have looked great as a low pendant over a table for mood lighting with the assistance of downlights as a main light source, however we are relying solely on two globes to light most of our living space. I couldn't take them back as I bought them privately but sold them on eBay for about twice as much as what I paid so it wasn't much of a loss. It WAS an education on how complicated lighting can be.

I needed something that was transparent. Glass or perspex. An open base. Clear.


Bring in the lights below. I had my eye on one of these for ages and loooked around for the best price.
One of these is a designer brand (or at least a replica of a designer brand, which may I add doesn't sit well with me) the other is a regular no frills light from a regular no frills store.
One of these is heavier than it looks, the other a lot lighter. This is something to consider when purchasing lights as they need to be able to attach to the ceiling without to much downward pressure.
One of these cost a couple of hundred. The other is a display model with an extra 15% discount of an already low price.
One of these was the light of my dreams, the other has woken me up to reality.
Both of these share the same idea and a similar design aesthetic so to me it made sense to buy "the other".

Exhibit A: MattBlatt Replica Massimo Belloni Chi Pendant in Small for $195.00 each.
Exhibit B: A light from a light shop near the Hunter Valley. $75.00 each. Discontinued stock.

I COULD go into fine detail as to why the one above is WAAAAY cooler, but in the end its not worth it and really, I am very happy with our purchases. Whadda bargain! Keep an eye on these when I post after Bill finishes off the electrical work. Probably in the new year.


Monday, November 1, 2010

Manhattan Apartment

Late in October, we had two plasterers come in and finish our ceiling. Very professional and very tidy, as well as reasonably priced considering they visited three times. They were a recommendation from one of Petes workmates. The best tradesmen are always from recommendations! The "after pictures" are of the ceiling after just two coats of undercoat. We probably could have gotten away with one but the 10L paint tin was on sale and 4 litres wouldn't have been enough so we thought we may as well use it up. We used Wattyl all purpose undercoat. The top coat is Wattyl "Manhattan Snow". Tinted using Wattyl TradeMax (the trade equivalent. Cheaper than the Design id range and the salesman assured us its pretty much the same thing and no harder to apply).


The wardrobe is now ready for the internals, rails and doors which will be installed this Thursday. Supplied by Impressive Wardrobes, they were the best price around and THE best service. We added some extra drawers with molded handles to the basic layout.


The image above, where the wire sticks down and has black tape on it, will be a pull switch for the light that is to be installed. We found a pull switch by Clipsal. They are actually pretty expensive for what they are, around $25.

The shadow line was a bugger, we had to fill the gaps with pollifilla around the whole perimeter of the unit. Its also a bugger to paint, getting into the gap with a tini-tiny brush. Awesome finish though. It looks really modern, spacious and clean. Just what you need for such a small space.


Still two coats of ceiling paint to go. Its a horrible job. Hurts your shoulders and back, I don't know how people do it as their full time job. Renovating is exhausting! The walls are much more fun with instant gratification. The image above is after just one coat of paint. So much nicer than that horrid yellow colour that was there before. If that was a paint sample it'd be called something like "smokers stain".

Sunday, September 19, 2010

Goodnight Vermiculite

On Saturday we tackled the ceiling in the bedroom. The hoist worked a treat. We wouldn't have been able to do the job without it. The plasterboard is HEAVY and big and really awkward to maneuver but the hoist, though seeming to be a cheep, rusty hunk of metal worked perfectly, even without the spring that fell off and went missing half way through the job...

Pete drilling up the first plasterboard sheet with our faithful hoist. The (temporary) pendant light behind him has a wooden block to give strength to the light fitting yet to be installed (drilling into the wood will be stronger than just drilling into vermiculite).


It was so nice to wake up on Sunday morning to the sight of a smooth ceiling. It was quite a dramatic effect from one days work.


We have opted for a shadow-line rather than a cornice. Much more modern and clean. This nifty metal edging form Greyking makes the job easy and neat. We ordered them in 3 meter strips and have enough to finish the rest of the ceiling.


Wednesday, September 8, 2010

The Bright Lights of Modernity

Currently, the lights in the apartment, (all but the bathroom light) seem to be original. They are brass and frosted glass, stuck to the ceilings like the first wave of oyster lights. They are not retro chic, vintage cool or period charm, so they must go.

We started the light journey into looking at LED down lights. After all, we were fitting a new ceiling, so we could take advantage of making life easy and installing them at the same time, before the plasterboard got in the way. After researching into it, mainly on blogs, the process it seemed would have been expensive, fiddly, risky and less effective than you may think. LED's are a fairly new type of globe, especially to the residential market. Each globe uses a very small amount of wattage to produce a massive amount of light. LED's can start and range up to 3,4,5 watts, the equivalent of a regular halogen down-light uses around 40-50 watts each. PLUS an LED globe lifespan can last for many years. (I've read up to 50,000 hours. That's about 6 years if you left it on 24 hours a day!!!)
Now here's the "BUT" and indeed it is an important one because we wont be installing LED down lights because of the buts. Each LED down light can cost around $80-$100, omitting 9 watts of power with a 3x3 watt globe. The light is very directional and lights up with a narrow beam rather than as a sheet of light. The light can also look quite blue, the newer "warm light" ones looked VERY yellow and artificial. Installing energy saving globes (that's the common spiral ones that were all used to now) into regular down light fittings were another option, however many people found that they took a long time to warm up as the globes are so small. A forum speaker said it took 30-60 seconds to light up, depending on how cold of a day it was.
As for regular down lights, by law you need to have a gap in your roof of 100mm (so we would have had to lower the ceiling by more than we wanted) because of potential fire hazards. There was no way I was installing hot little burning embers in the ceiling. (Plus they output waaay to much energy which was the reason behind the LED saga in the first place.


Here is our solution:
For the bedroom, we purchased this lovely bit of bling. They were selling this in the shop for around $500. I bought the very same from a guy in Waterloo who was selling it on Ebay for $200 (I got him down to $150 though!). He bought it back from Hong Kong but couldn't install it because it was too heavy. Its VERY heavy actually, though made out of acrylic. Our ceilings being concrete will be able to withstand the weight.


Something similar to this was purchased from Luminous Lifestyle. These spot lights are a new addition and will sit next to the shelves, lighting up the dullest corner of our apartment.


Similar to this Louis Poulsen "Satelitte" light, a timeless design from the 50's, we purchased two lights to sit as spotlights over the prep area once we install our new kitchen.


I found this image online as inspiration for two drum lights to go in both the lounge and dining area. Most pendant lights I have found only have one globe with a maximum wattage of 100, (That's 20 watts with energy saving globes.) and I'm not sure if its going to be bright enough. Need to test this out and then go shopping so were ready for the electrician. Hes coming this Tuesday to start work.